im going to either try and update this more, or dump it all together.
anyhow, heres what im planning on making next:
Sunday, August 17, 2008
Tuesday, December 18, 2007
luma and mellon pan papercraft
So yea, i dont update this too often, but uhm, a while ago I worked on a luma papercraft pattern with a person (TSONTS) on /po/. I made the model, and TSONTS made the pattern. I'll post the jpeg pattern whenever I actually get around to it lol.
Tonight I made a "mellon pan" model in 3ds max, textured in zbrush (holy crap, i actually unwraped the uv this time instead of automate it).

The pattern is almost ready, i'll post it when its done, whenever that may be. Heres another view of the model:


Tonight I made a "mellon pan" model in 3ds max, textured in zbrush (holy crap, i actually unwraped the uv this time instead of automate it).

The pattern is almost ready, i'll post it when its done, whenever that may be. Heres another view of the model:

Saturday, October 20, 2007
it works!
whee! Today my decal vinyl and iron-on vinyls came in!
The test run turned out great! (Pictures if i ever get around to it)
 This is the design sketch:
Front= Core drill necklace
(screen print or vinyl)
Back = Gurren-Dan symbol
(vinyl)
Still dunno if i should do the white of the glasses or not...
I guess if I dont screen-print the core drill and use the vinyl method then I'll go ahead and put the white on there too.
The back graphic looks pretty sharp right now in the test model. Really nice feel on the shirt too, not at all plastic-y like the ink-jet iron ons I use to make. (well I guess I still make them, but for pillows).
I think for conventions, I would much rather stick to doing books of artwork, buttons, and some sorta garment (like t-shirt or scarf). Stuff that doesn't require much sewing. and dont take a whole lotta space...
After I'm done with this t-shirt and scarf project, along with the pillows, I think I'll keep the pillows to commission only.
Then again I might now be doing more cons in the near or far future, so we'll see we'll see. But I sure would like to get started on that art book though.
Anyway, back to today's crafty things!
As I've said, I was working on the Gurren Lagann t-shirt idea majority of the time. (I really ought to do commissions and such though.... I'll wait till tomorrow).
The craft robo cuts the symbol on the iron-on vinyl very nicely. It took two tries at first (the blade didn't cut it all the way through). The best setting to cut the iron-on vinyl is the yellow tip (heck, maybe even the pink one). Its a bit tough to weed out the extra vinyl around the large logo, so I might make some extra cut lines in the future.
For ironing it was just setting the t-shirt press to 350 degrees (like baking cookies :D) then put on the teflon sheet on top, iron for 20 seconds. Rub on it to cool down, then peel, ta-da! done!
Very very simple.
I also got a material call "flock" (all of which comes from this site) and it feels just like those red velvet ribbons for Christmas decoration. Very nice and soft! It was rather tricky to cut at first, since I bought a foot of it (more like 14x15") and I cut it into quarters, but it doesn't fit into the craft robo (it needs to catch the two rollers in order to feed it into the machine). So I took the vinyl transfer sheet (basically frisket film/book cover plastic) and cut it into letter size paper. I then place a piece of construction paper on it, and did a test run with the ball point pen attachment. This turns out to be one of the best uses of craft robo, I can actually tell where its going to cut first! (BTW, do NOT just put plain paper into the craft robo without sticking the plastic on the back first, or else it will absolutely tear it up and get stuck.
Anyway~ so after finding out where it would cut, i place the flock on the plastic sheet (with a corner cut out of the construction paper) and cut it with the pink tip, BUT SET IT TO PEN MODE! Pen mode doesn't run the paper back and fourth several times like it does for all the other modes, so the paper wont just run off the craft robo because its not long enough to reach.
The ironing is even more simple than before, no need for teflon sheet, but have to pre-heat the garment for 4 sec at 320 degrees, then iron for 15-20 seconds. Its a bit tougher to peal once it is done, but the result is very amazing on fleece! it feels like its a part of it! (btw, it seems flock is a lot easier to weed than the other stuff, but then again i need to test it out some more).
Anyway, so I now have a prototype t-shirt and a prototype scarf. both I would say turned out pretty good! I just need to figure out how much I am spending on supplies and make a reasonable price to put at my table!
The test run turned out great! (Pictures if i ever get around to it)
 This is the design sketch:
Front= Core drill necklace
(screen print or vinyl)
Back = Gurren-Dan symbol
(vinyl)
Still dunno if i should do the white of the glasses or not...
I guess if I dont screen-print the core drill and use the vinyl method then I'll go ahead and put the white on there too.
The back graphic looks pretty sharp right now in the test model. Really nice feel on the shirt too, not at all plastic-y like the ink-jet iron ons I use to make. (well I guess I still make them, but for pillows).
I think for conventions, I would much rather stick to doing books of artwork, buttons, and some sorta garment (like t-shirt or scarf). Stuff that doesn't require much sewing. and dont take a whole lotta space...
After I'm done with this t-shirt and scarf project, along with the pillows, I think I'll keep the pillows to commission only.
Then again I might now be doing more cons in the near or far future, so we'll see we'll see. But I sure would like to get started on that art book though.
Anyway, back to today's crafty things!
As I've said, I was working on the Gurren Lagann t-shirt idea majority of the time. (I really ought to do commissions and such though.... I'll wait till tomorrow).
The craft robo cuts the symbol on the iron-on vinyl very nicely. It took two tries at first (the blade didn't cut it all the way through). The best setting to cut the iron-on vinyl is the yellow tip (heck, maybe even the pink one). Its a bit tough to weed out the extra vinyl around the large logo, so I might make some extra cut lines in the future.
For ironing it was just setting the t-shirt press to 350 degrees (like baking cookies :D) then put on the teflon sheet on top, iron for 20 seconds. Rub on it to cool down, then peel, ta-da! done!
Very very simple.
I also got a material call "flock" (all of which comes from this site) and it feels just like those red velvet ribbons for Christmas decoration. Very nice and soft! It was rather tricky to cut at first, since I bought a foot of it (more like 14x15") and I cut it into quarters, but it doesn't fit into the craft robo (it needs to catch the two rollers in order to feed it into the machine). So I took the vinyl transfer sheet (basically frisket film/book cover plastic) and cut it into letter size paper. I then place a piece of construction paper on it, and did a test run with the ball point pen attachment. This turns out to be one of the best uses of craft robo, I can actually tell where its going to cut first! (BTW, do NOT just put plain paper into the craft robo without sticking the plastic on the back first, or else it will absolutely tear it up and get stuck.
Anyway~ so after finding out where it would cut, i place the flock on the plastic sheet (with a corner cut out of the construction paper) and cut it with the pink tip, BUT SET IT TO PEN MODE! Pen mode doesn't run the paper back and fourth several times like it does for all the other modes, so the paper wont just run off the craft robo because its not long enough to reach.
The ironing is even more simple than before, no need for teflon sheet, but have to pre-heat the garment for 4 sec at 320 degrees, then iron for 15-20 seconds. Its a bit tougher to peal once it is done, but the result is very amazing on fleece! it feels like its a part of it! (btw, it seems flock is a lot easier to weed than the other stuff, but then again i need to test it out some more).
Anyway, so I now have a prototype t-shirt and a prototype scarf. both I would say turned out pretty good! I just need to figure out how much I am spending on supplies and make a reasonable price to put at my table!
Friday, October 19, 2007
Busy busy...
I just realized recently how little time there are every day. So I'm going to work harder!
Nekocon is coming up, and I've decided to go with the scarf idea. After printing the design on iron-on paper for dark fabric, I use the CraftRobo to cut it out! (I used to have to do this all by hand).
Sorry, my camera can only take videos 30 seconds at a time >_<
The damn machine is LOUD, and its not the "cutting" that is making the noise, but the motor and the belts moving (like those old-fashion printers). It cuts all the way through is some areas, but overall it leaves perfect cuts all the way around the images from what I have in Illustrator. (It reads the registration marks before cutting).
I've ironed 9 scarfs with the t-shirt press, two of which turned out a bit darker than I wanted. Right now I have a midna scarf sitting in a tub of water to make sure it wont bleed when it gets wet. But now I've ran out of fleece and the fabric store ran out... :/ shit.
Next up will be my vinyl coming in the mail! Woot!
Thursday, October 11, 2007
Lost track..
I find it very difficult to keep track of what I do and actually update blogs and journals.
... so yea. I'll post a bunch of pictures and short description during the weekend, or when I have time.
... so yea. I'll post a bunch of pictures and short description during the weekend, or when I have time.
Thursday, October 4, 2007
Recieving my craft robo!
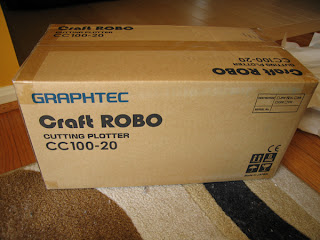
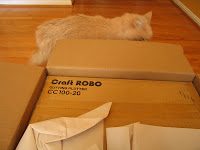
I ordered this through ebay last week. This would've arrived earlier but stupid FedEx required someone in person to sign for it.
Well its finally here.
...
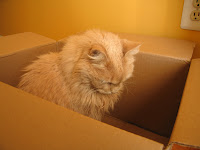
And here is my cat who loves the box it came in. or not, she just looks kinda grumpy there.
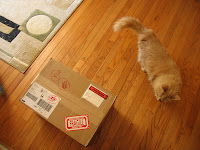
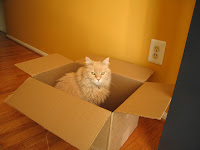
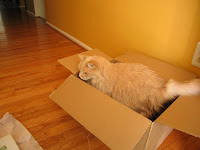
So anyhow.... heres the real thing:
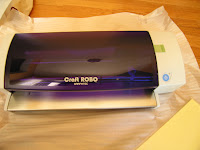

quite a few failures during testing that I didnt take pictures of, but I did try making vinyl decals, first with vectors from illustrator and using their provided plug-in to cut the decals out with the craft robo. (btw, the vinyl came from a 24 pack set also bought from ebay)
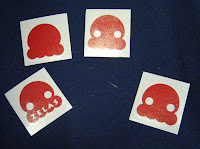
Some more failure tests afterword, but thats about all I have today!
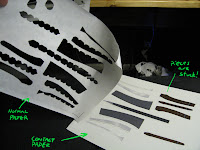
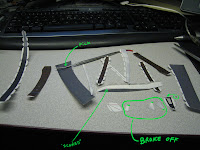
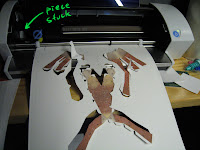
Ah yes, one more thing. Here are the steps of going from illustrator to craft robo (first posted on 4chan's /po/ board) :
- open up the .pdo with pepakura designer 2
- export the cut lines to ".dxf"
- export the bmp out
- open up Illustrator (CS)
- import the bmp and lock the layer
- import the .dxf file (it will be all the lines, color coded) for cutting it up.
- you will have to match the .dxf to the bmp, make sure the lines are a close fit.
- use the craft robo plugin to place registration marks on the edges of the document
- if anything is outside the registration, then move it in.
- print out the image (make sure you turn off the lines layer if you dont want it to show)
- load the printed pattern into the craft robo
- use the plugin in Illustrator under "craft robo> settings" to tell it what kind of cut marks you want for the outside lines and the fold lines
(it can "score" the fold lines, but what it really does is make perforated cuts, which isnt very good for small pieces). - after all adjustment complete, click on "craft robo" in the dialog box and it will load up the configure to cut it out!
hello world
Isn't it required to always have an "hello world" as the first thing of everything?
Whatever. This is the place where I, Zelas, posts my arts and crafts and any other shit that is relevant to my interests. Which is a lot. Anything from paintings, to ball-joint-dolls, but I'll post most "artsy" things at my DA site: zelas.deviantart.com
Well I think thats all I have to say, for now.
Subscribe to:
Posts (Atom)
